Mirth Connect: Part 2 - Adding 🐰RabbitMQ

Using RabbitMQ with Mirth Connect can offer several advantages, especially in complex healthcare integration scenarios.
So why add RabbitMQ to Mirth Connect?

Scalability
RabbitMQ is designed to handle a high volume of messages and can be clustered for increased throughput and redundancy. By integrating RabbitMQ with Mirth Connect, you can ensure that Mirth can handle a large volume of HL7 or other healthcare messages without becoming a bottleneck.
Reliability
RabbitMQ provides message durability and delivery acknowledgments. This means that even if a consumer (like Mirth Connect) fails to process a message, the message won't be lost. It can be re-queued and processed again, ensuring that critical healthcare messages don't get lost.
Decoupling
RabbitMQ can act as a buffer between message producers and consumers. If Mirth Connect needs to undergo maintenance or is temporarily offline, incoming messages can still be sent to RabbitMQ. Once Mirth is back online, it can start processing messages from the queue. This decoupling ensures that message producers aren't directly affected by the downtime of consumers.
Flexible Routing
RabbitMQ's exchange and queue model allow for flexible message routing. Depending on the content or type of the message, RabbitMQ can route messages to different queues, which Mirth Connect can then process differently. This is especially useful in healthcare scenarios where different types of messages (e.g., ADT, ORU) might need different processing.

Load Balancing
If there are multiple instances of Mirth Connect processing messages, RabbitMQ can distribute the load among these instances. This load balancing ensures that no single Mirth instance is overwhelmed with too many messages.
Integration with Other Systems
RabbitMQ isn't limited to just working with Mirth Connect. Other systems in the healthcare infrastructure can also interact with RabbitMQ, either producing or consuming messages. This makes RabbitMQ a central hub for messaging, facilitating easier integration between different systems.

Enhanced Monitoring and Management
RabbitMQ comes with a management plugin that provides a web-based UI to monitor the health of the broker, view message rates, and manage queues and exchanges. This can be invaluable in a healthcare setting to ensure messages are flowing smoothly.Let’s see how we can leverage RabbitMQ with Mirth Connect.
RabbitMQ Setup

RabbitMQ is based on AMQP and not JMS, there are client libraries available that allow Java applications using the JMS API to interact with RabbitMQ. This means you can write your Java application using the JMS API but have it communicate with RabbitMQ as the message broker.
To avoid having to install and configure RabbitMQ ourselves, let’s use a RabbitMQ Docker image.
To start the RabbitMQ container with name "some-rabbit", listening on port 5672, and serving the management interface on port 8081 run: docker run -d --hostname my-rabbit --name some-rabbit -p 8081:15672 -p 5672:5672 rabbitmq:3-management
Also, to enable extra plugins like Topic Exchange you can run the following command on the container: docker exec -it some-rabbit rabbitmq-plugins enable rabbitmq_jms_topic_exchange
To see a list of running plugins you can run the following command on the container: docker exec -it some-rabbit rabbitmq-plugins list
Management Interface
With the container running you should be able to pull up the management interface at
- http://localhost:8081
- Username: guest
- Password: guest
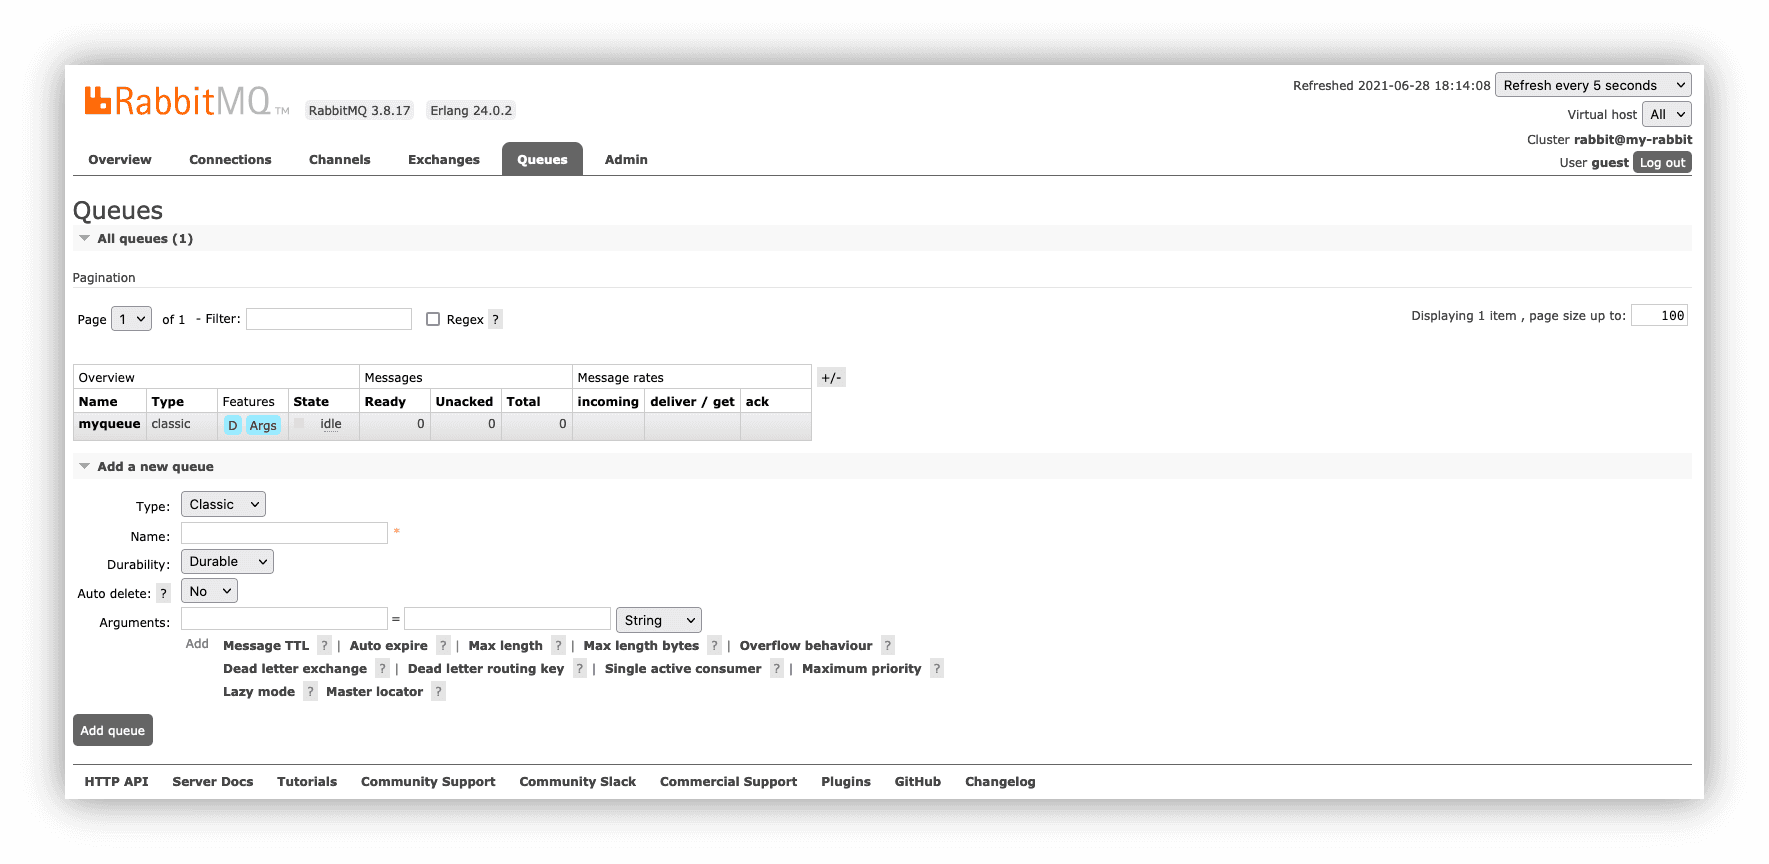
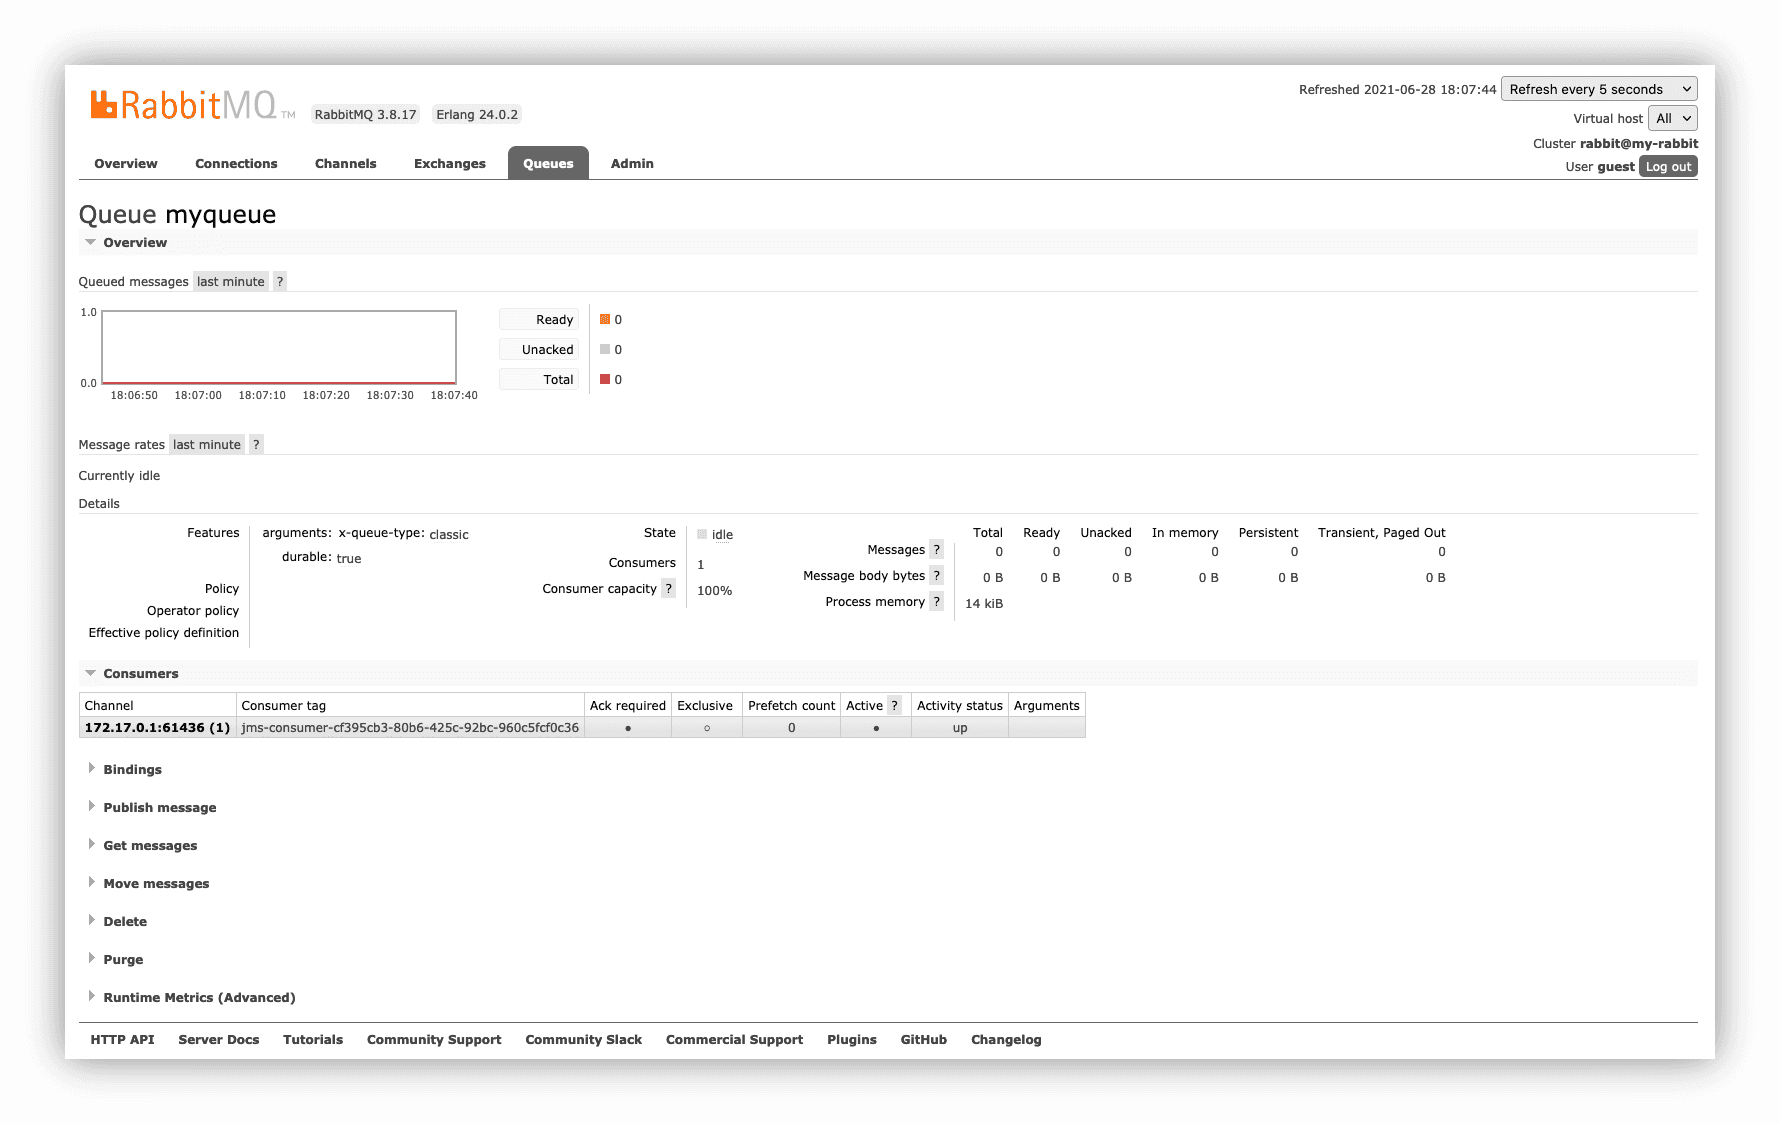
Once logged in, create a queue by navigating to the "Queues" tab and create a queue named "myqueue". It should look something like this:
Updates To Mirth Connect
Import the latest RabbitMQ libraries (you need both the JMS client and Java client) into a dedicated resource for use in your channels. Note, as of 4.0.1, there is a problem with using these libraries in JMS connectors so you will have to place them in custom-lib and set server.includecustomlib = true in mirth.properties. For example:
- rabbitmq-jms-2.3.0.jar (https://mvnrepository.com/artifact/c...s/rabbitmq-jms)
- amqp-client-5.12.0.jar (https://mvnrepository.com/artifact/c...mq/amqp-client)
For documentation on the RabbitMQ JMS Client see:
- https://www.rabbitmq.com/jms-client.html
- https://github.com/rabbitmq/rabbitmq-jms-client
- https://github.com/rabbitmq/rabbitmq-java-client

Steps
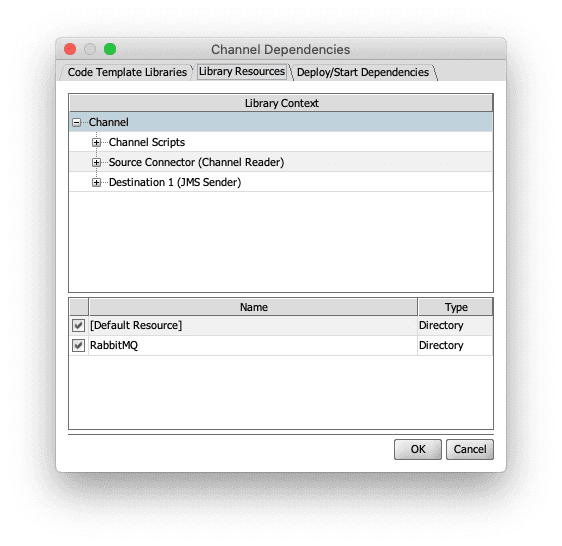
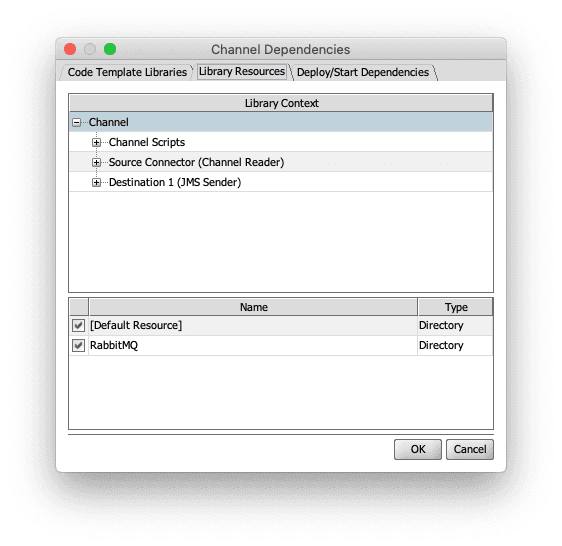
1. Set your channel dependencies to include the resource containing the RabbitMQ jars.
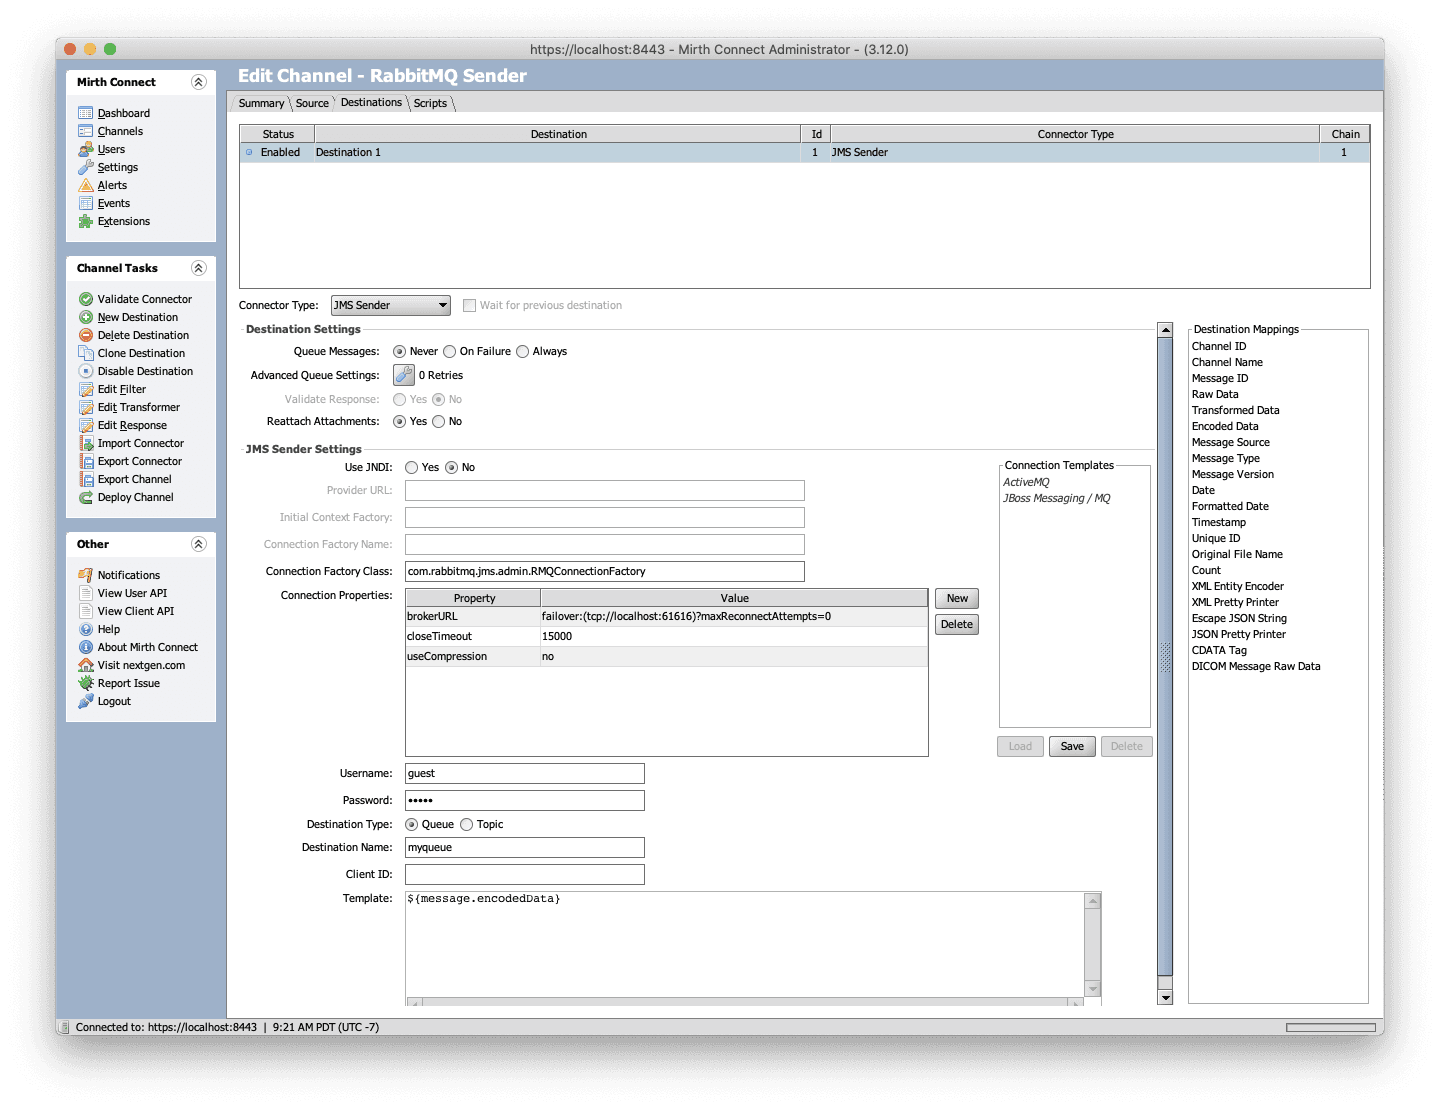
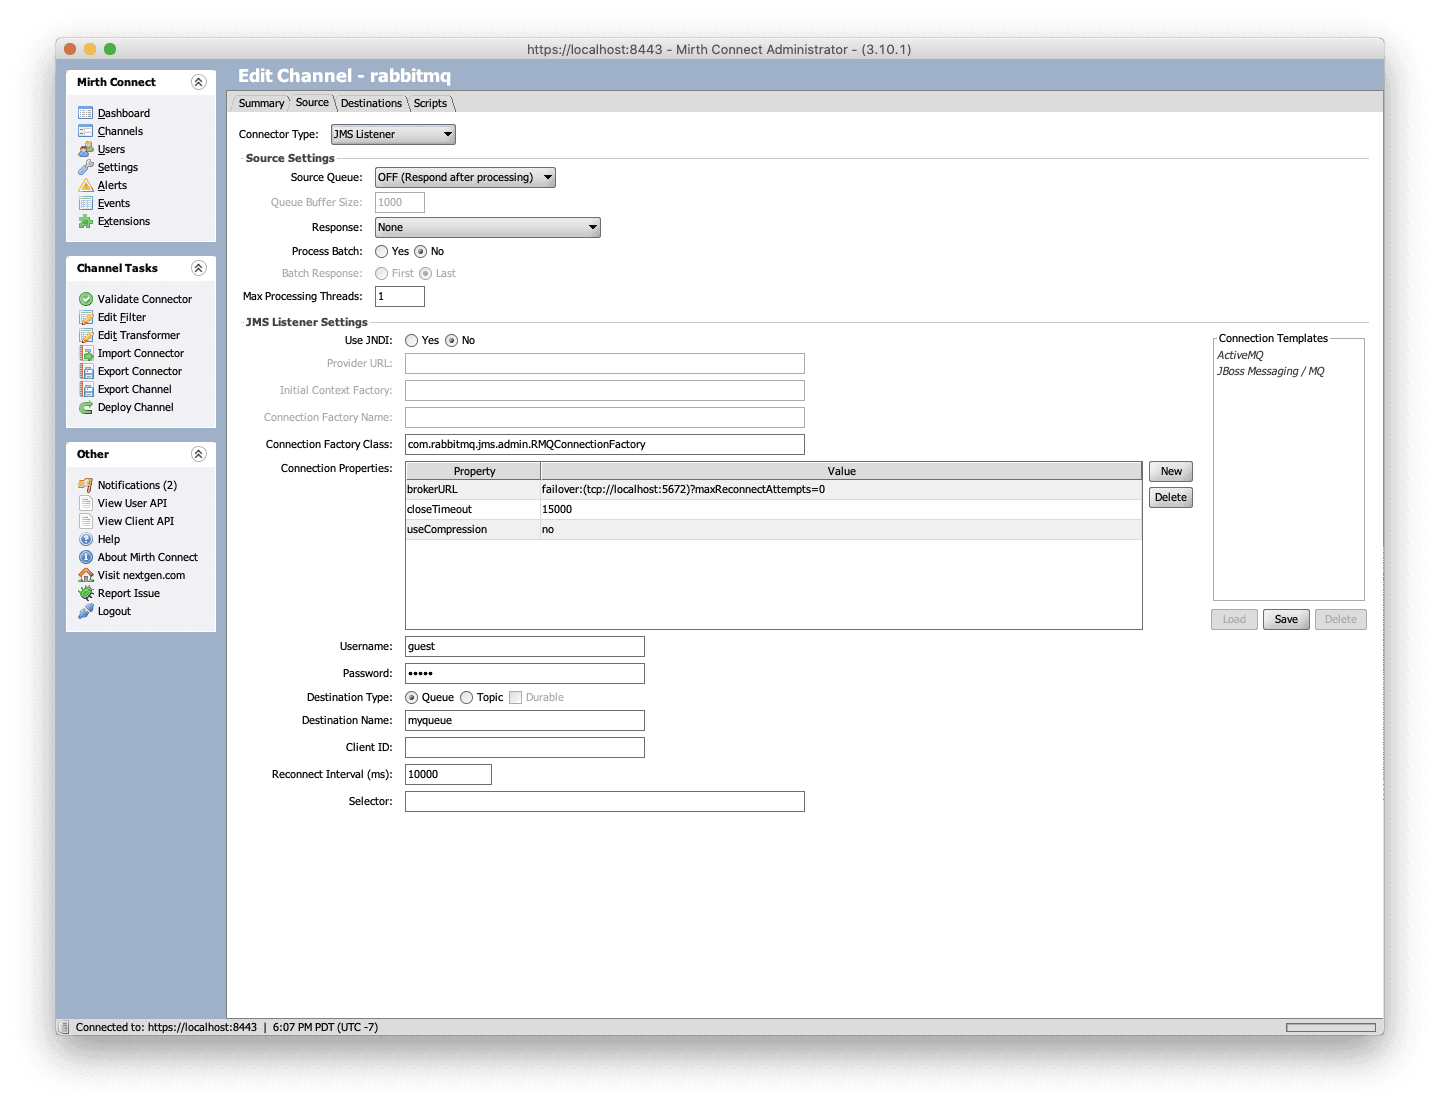
2. Set your Destination Connector Type to: JMS Sender
3. Use JNDI: No
4. Load the ActiveMQ template
5. Set Connection Factory Class to:`com.rabbitmq.jms.admin.RMQConnectionFactory`
6. Set the brokerURL to:`failover:(tcp://localhost:5672)?maxReconnectAttempts=0`
7. Set Username to: guest
8. Set Password to: guest
9. Set Destination Type to: Queue
10. Set Destination Name to: myqueue
11. Deploy channel
12. Send a test message
13. Observe the message is sent with no errors
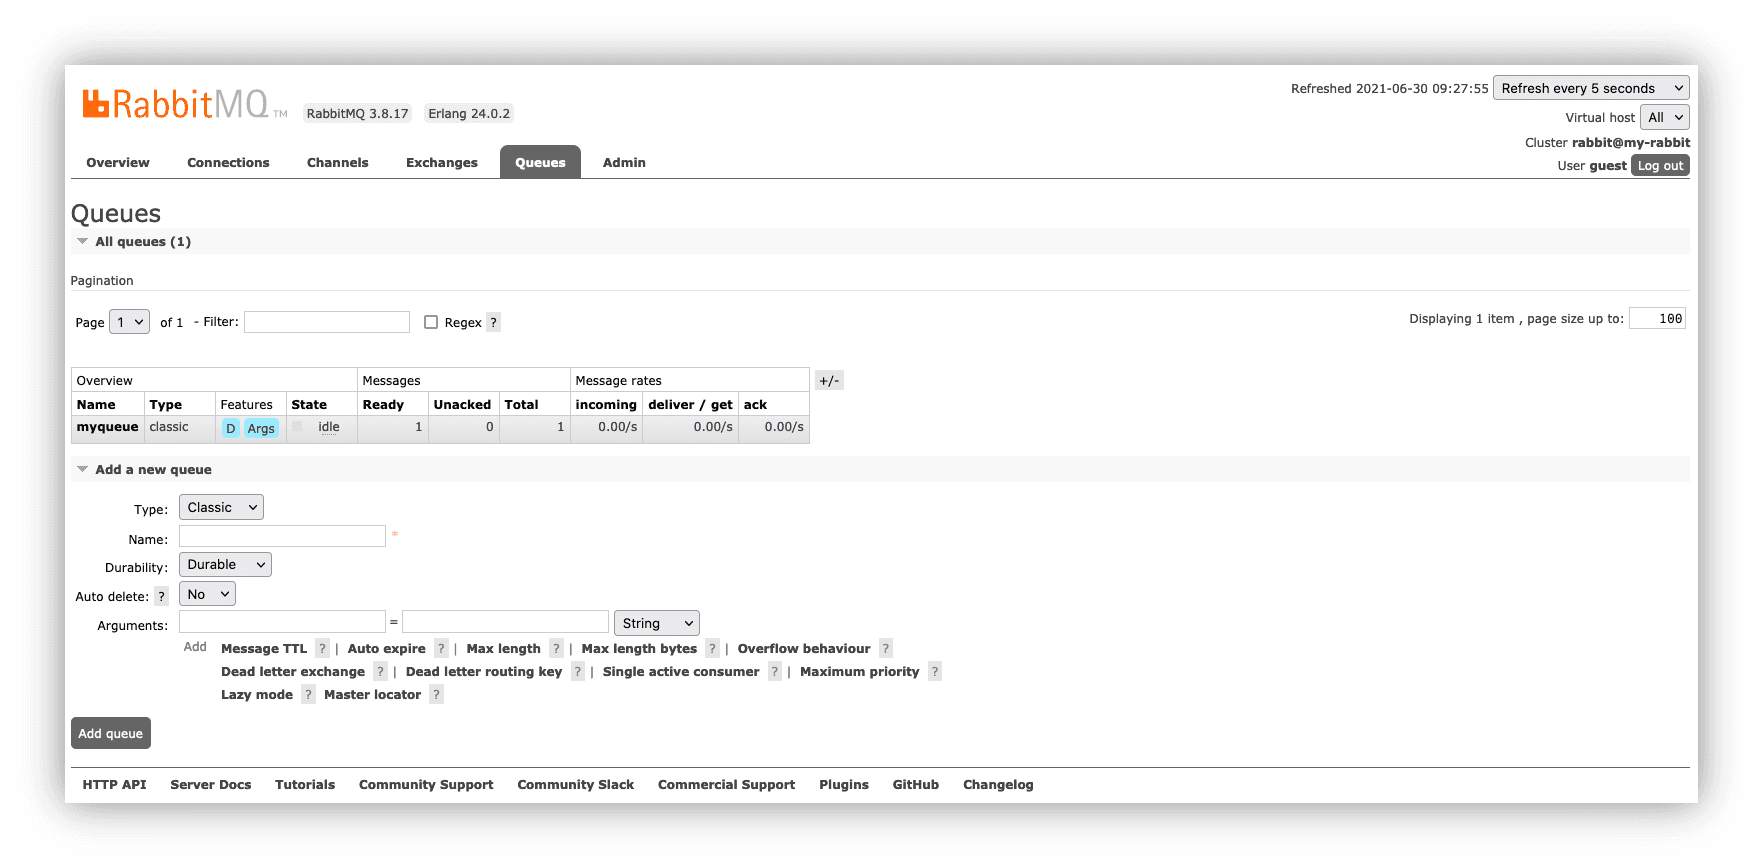
14. Observe in the RabbitMQ UI that "myqueue" has one message ready
Steps
1. Set your channel dependencies to include the resource containing the RabbitMQ jars.
2. Set your Destination Connector Type to: JMS Sender
3. Use JNDI: No
4. Load the ActiveMQ template
5. Set Connection Factory Class to:`com.rabbitmq.jms.admin.RMQConnectionFactory`
6. Set the brokerURL to:`failover:(tcp://localhost:5672)?maxReconnectAttempts=0`
7. Set Username to: guest
8. Set Password to: guest
9. Set Destination Type to: Queue
10. Set Destination Name to: myqueue
11. Deploy channel
12. Send a test message
13. Observe the message is sent with no errors
14. Observe in the RabbitMQ UI that "myqueue" has one message ready**
🎉 We did it! We have successfully integrated RabbitMQ with Mirth Connect all using docker. We can keep a clean setup that is portable and easy to maintain.
